Posts

依赖

go list -m all
go list -m -versions github.com/minio/cli

模块初始化 mkdir -p $GOPATH/src/github.com cd $GOPATH/src/github.com mkdir -p wubigo/API/go/hello cd wubigo/API/go/hello go mod init github.com/wubigo/API/go/hello 检查go.mod ll go.mod cat go.mod module github.com/wubigo/API/go/hello go 1.13 创建程序 hello.go package main import ( "fmt" "github.com/google/go-cmp/cmp" ) func main() { fmt.Println(cmp.Diff("Hello World", "Hello Go")) } package main声明该模块是一个可执行程序而不是共享库 编译测试 go install github.com/wubigo/API/go/hello 或者 go install . 或者 go install -n 检查go.mod go.mod module github.com/wubigo/API/go/hello go 1.

Set namespace preference kubectl config set-context $(kubectl config current-context) --namespace=<bigo> watch pod kubectl get pods pod1 --watch Check Performance kubectl top node kubectl top pod copy file between pod and local kubectl cp ~/f1 <namespace>/<pod-name>:/tmp/ kubectl cp <namespace>/<pod-name>:/tmp/ ~/ enable RBAC kube-apiserver - --authorization-mode=RBAC User CRUD openssl genrsa -out bigo.key 2048 openssl req -new -key bigo.key -out bigo.csr -subj "/CN=wubigo/O=bigo LLC" sudo openssl x509 -req -in bigo.

InnoDB

MySQL 5.1 shipping the older version of InnoDB, If you’re using MySQL 5.1, please ensure that you’re using the InnoDB plugin. It’s much better than the older version of InnoDB.

It now scales well to 24 CPU cores, and arguably up to 32 or even more cores depending on the scenario

Puppeteer vs Selenium/WebDriver Selenium/WebDriver focuses on cross-browser automation; its value proposition is a single standard API that works across all major browsers. Puppeteer focuses on Chromium; its value proposition is richer functionality and higher reliability. That said, you can use Puppeteer to run tests against Chromium, e.g. using the community-driven jest-puppeteer. While this probably shouldn’t be your only testing solution, it does have a few good points compared to WebDriver: * Puppeteer requires zero setup and comes bundled with the Chromium version it works best with, making it very easy to start with.

安装 sudo add-apt-repository ppa:wireguard/wireguard sudo apt-get update sudo apt-get install wireguard -y 打开安全组 南向Inbound rules(udp:51820) 配置 创建key wg genkey | tee privatekey | wg pubkey > publickey private_key=$(wg genkey) public_key=$(echo $private_key | wg pubkey) 配置 ip a 1: lo: <LOOPBACK,UP,LOWER_UP> mtu 65536 qdisc noqueue state UNKNOWN group default qlen 1 link/loopback 00:00:00:00:00:00 brd 00:00:00:00:00:00 inet 127.0.0.1/8 scope host lo valid_lft forever preferred_lft forever inet6 ::1/128 scope host valid_lft forever preferred_lft forever 2: eth0: <BROADCAST,MULTICAST,UP,LOWER_UP> mtu 9001 qdisc pfifo_fast state UP group default qlen 1000 link/ether 0a:81:39:72:97:90 brd ff:ff:ff:ff:ff:ff inet 10.

Death of Microservice Madness

http://www.dwmkerr.com/the-death-of-microservice-madness-in-2018/

how-to-allow-local-network-when-using-wireguard-vpn-tunnel 允许非隧道流量 Open the WireGaurd Windows client. In the left pane, select the tunnel that you want local network routing to work, if you have more than one tunnel. Hit the Edit button. Uncheck Block untunneled traffic (kill-switch) option 增加本地的网络 AllowedIPs = 192.168.0.0/16, 0.0.0.0/1, 128.0.0.0/1, ::/1, 8000::/1 安装 https://download.wireguard.com/windows-client/wireguard-amd64-0.0.38.msi 配置 更改公钥 Endpoint所在的vpn服务器地址 https://github.com/Nyr/openvpn-install https://github.com/hwdsl2/setup-ipsec-vpn https://wireguard.isystem.io/ https://github.com/meshbird/meshbird https://www.tinc-vpn.org/ https://github.com/isystem-io/wireguard-aws Download and install the TunSafe, which is a Wireguard client for Windows.

Hijack of Amazon’s domain service used to reroute web traffic for two hours https://doublepulsar.com/hijack-of-amazons-internet-domain-service-used-to-reroute-web-traffic-for-two-hours-unnoticed-3a6f0dda6a6f Socioeconomic group classification based on user features http://pimg-faiw.uspto.gov/fdd/83/2018/28/003/0.pdf The long, tortuous and fascinating process of creating a Chinese font (qz.com) https://qz.com/522079/the-long-incredibly-tortuous-and-fascinating-process-of-creating-a-chinese-font/ Announcing 1.1.1.1: the fastest, privacy-first consumer DNS service https://blog.cloudflare.com/announcing-1111/ Introducing Cloud Text-to-Speech powered by DeepMind WaveNet technology https://cloudplatform.googleblog.com/2018/03/introducing-Cloud-Text-to-Speech-powered-by-Deepmind-WaveNet-technology.html Announcing gRPC Support in NGINX https://www.nginx.com/blog/nginx-1-13-10-grpc/ ACME v2 and Wildcard Certificate Support is Live https://community.letsencrypt.org/t/acme-v2-and-wildcard-certificate-support-is-live PIXAR’S 22 RULES OF STORYTELLING https://www.

FROM centos:7
RUN echo "ip_resolve=4" >> /etc/yum.conf
RUN yum update -y && yum install -y java-1.8.0-openjdk
# 设置时区(日志、调用链)
RUN /bin/cp /usr/share/zoneinfo/Asia/Shanghai /etc/localtime
RUN echo "Asia/Shanghai" > /etc/timezone
ENV workdir /app/
ADD VERSION .

WORKDIR ${workdir}
# JAVA_OPTS环境变量JVM 启动参数,在运行时 bash 替换
# 使用 exec 以使 Java 程序可以接收 SIGTERM 信号。
CMD ["sh", "-ec", "exec java ${JAVA_OPTS} -jar ${jar}"]

DDoS 基础防护

腾讯云 DDoS 基础防护本身免费,当用户购买了腾讯云 CVM、CLB 等服务时,会自动开启 DDoS 基础防护。

普通用户提供2Gbps的防护能力,最高可达10Gbps

高防IP

高防包不需要更改客户业务 IP,高防IP需要客户将腾讯的高防 IP 作为业务 IP 发布;

高防包只能防护一台云主机或一台负载均衡( 1 个公网 IP),高防 IP 可防护多台云主机;

高防包只能防护腾讯云内设备,高防 IP 可防护非腾讯云设备

Gone with the Wind

https://www.amazon.com/Gone-Wind-Margaret-Mitchell

Deep Learning with Python

https://www.manning.com/books/deep-learning-with-python

How to Win Friends and Influence People

https://www.amazon.com/How-Friends-Influence-People-Chinese

Books I read this year

https://www.gatesnotes.com/About-Bill-Gates/Best-Books-2017

Enabling Enhanced Networking on Ubuntu

sudo apt-get update && sudo apt-get upgrade -y linux-aws

https://docs.aws.amazon.com/AWSEC2/latest/UserGuide//sriov-networking.html#enhanced-networking-ubuntu

VLAN

VLAN(802.1Q)是一个局域网技术,能够将一个局域网的广播域隔离为多个广播域,常被用来实现一个站点内不同的部门间的隔离

数据中心网络虚拟化——NVo3技术端到端隧道

NVo3(Network Virtualization over Layer 3),是IETF 2014年十月份提出的数据中心虚拟化技术框架。

NVo3基于IP/MPLS作为传输网,在其上通过隧道连接的方式,构建大规模的二层租户网络。NVo3的技术模型如下所示,

PE设备称为NVE(Network Virtualization Element),VN Context作为Tag标识租户网络,P设备即为普通的IP/MPLS路由器。

NVo3在设计之初,VxLAN与SDN的联合部署已经成为了数据中心的大趋势,因此NVo3的模型中专门画出了

NVA(Network Virtualization Authority)作为NVE设备的控制器负责隧道建立、地址学习等控制逻辑

VxLAN(Virtual eXtensible LAN,RFC 7348)

Vmware和Cisco联合提出的一种二层技术,突破了VLAN ID只有4k的限制,允许通过现有的IP网络进行隧道的传输。

别看VxLAN名字听起来和VLAN挺像,但是两者技术上可没什么必然联系。VxLAN是一种MACinUDP的隧道.

NvGRE

NvGRE(Network virtualization GRE,RFC draft)是微软搞出来的数据中心虚拟化技术,是一种MACinGRE隧道。它对传统的GRE报头进行了改造,增加了24位的VSID字段标识租户,而FlowID可用来做ECMP。由于去掉了GRE报头中的Checksum字段,因此NvGRE不支持校验和检验。NvGRE封装以太网帧,外层的报头可以为IPv4也可以为IPv6

https://www.sdnlab.com/nv-subject/

创建BUCKET

使用两种方式之一创建BUCKET

  • terraform

    git clone https://github.com/wubigo/iaas
    
    cd s3
    
    terraform apply
    
    
  • awscli

    aws s3 website s3://s.wubigo.com/ --index-document index.html --error-document 404.html
    aws s3api put-bucket-policy --bucket s.wubigo.com --policy file://policy.json
    

确认配置

aws s3api get-bucket-website --bucket s.wubigo.com
{
    "IndexDocument": {
        "Suffix": "index.html"
    },
    "ErrorDocument": {
        "Key": "404.html"
    }
}

配置DNS C记录

查看S3 Website Endpoints: s.wubigo.com.s3-website-ap-northeast-1.amazonaws.com
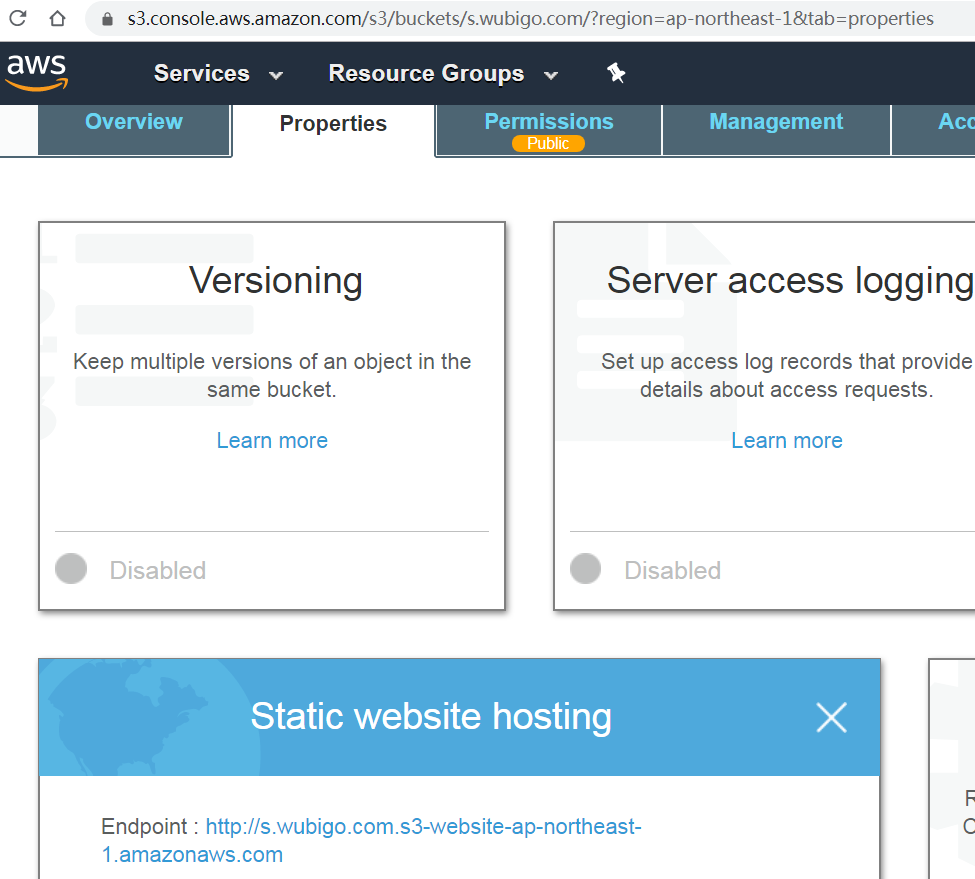
CNAME Record	    s    s.wubigo.com.s3-website-ap-northeast-1.amazonaws.com

上传站点内容

aws s3 cp wubigo.github.io s3://s.wubigo.com/ --recursive

go version go version go version go1.13.5 windows/amd64 vs proxy 根据code提示自动安装插件 手工安装插件 go代理配置 set http_proxy=http://127.0.0.1:4910 git代理配置 git config --global http.proxy https://127.0.0.1:4910 git config --global http.sslverify "false" 手工安装插件 go get -u -v github.com/go-delve/delve/cmd/dlv go get -u -v github.com/ramya-rao-a/go-outline go get -u -v github.com/ramya-rao-a/go-outline go get -u -v github.com/acroca/go-symbols go get -u -v github.com/mdempsky/gocode go get -u -v github.com/rogpeppe/godef go get -u -v golang.org/x/tools/cmd/godoc go get -u -v github.

与回调函数的区别 不用写错误条件if (err) return callback(err) Promise能被作为对象返回并被后期调用 回调 function successCallback(result) { console.log("Audio file ready at URL: " + result); } function failureCallback(error) { console.error("Error generating audio file: " + error); } createAudioFileAsync(audioSettings, successCallback, failureCallback); promise const promise = createAudioFileAsync(audioSettings); promise.then(successCallback, failureCallback); or createAudioFileAsync(audioSettings).then(successCallback, failureCallback); 状态 Promise有三种状态 pending: Initial Case where promise instantiated. fulfilled: Success Case which means promise resolved. rejected: Failure Case which means promise rejected.

对象创建有如下几种方式 使用{} let animal = {} animal.name = 'Leo' animal.energy = 10 animal.eat = function (amount) { console.log(`${this.name} is eating.`) this.energy += amount } animal.sleep = function (length) { console.log(`${this.name} is sleeping.`) this.energy += length } animal.play = function (length) { console.log(`${this.name} is playing.`) this.energy -= length } 构造函数 function Animal (name, energy) { let animal = {} animal.name = name animal.energy = energy animal.eat = function (amount) { console.

Architecture domain

Since Stephen Spewak’s Enterprise Architecture Planning (EAP) in 1993, and perhaps before then, it has been normal to divide enterprises architecture into four architecture domains.

  • Business architecture,
  • Data architecture,
  • Applications architecture,
  • Technology architecture.

Layers of the enterprise architecture

set registry npm config set registry=http://registry.npm.taobao.org npm config ls -l userconfig = "C:\\Users\\Administrator\\.npmrc" declare variables ES6 comes with two more options to declare your variables: const and let. In JavaScript ES6, you will rarely find var anymore. A variable declared with const cannot be re-assigned or re-declared. It cannot get mutated (changed, modified) Immutability is embraced in React and its ecosystem. That’s why const should be your default